


Techniques to Handle Extreme Regurgitation
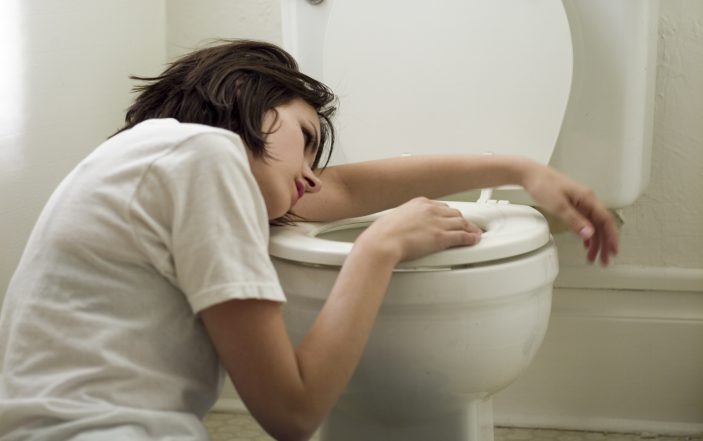
A 53-year-female presents with recurrent emesis. She is hypotensive, hypoxic, tachycardic and confused. She is recurrently coughing in between her periods of emesis and her lungs have crackles. You are concerned about her airway. Fortunately, your stellar nurse has already obtained bilateral intravenous access and brought the airway equipment to the bedside. You prepare for what will likely be a difficult airway.
Almost every emergency physician will face a challenging airway during their career. This may include the patient with severe facial trauma, a patient with severe angioedema or the patient with refractory hypoxia, despite preoxygenation. What about the patient with massive regurgitation and other material in the airway? The majority of the time, vomiting is a minor nuisance, but during intubation with high quantities of vomit or blood, aspiration and failure to obtain a definitive airway are real dangers. This article will discuss the standard Yankauer, the SALAD Park technique and intubation with a suction device.

The Idea Behind it…
SALAD, or Suction Assisted Laryngoscopy Airway Decontamination, comes from the great mind of Dr. James Du Canto.[1-4] This technique assists in cleaning up the soiled airway in the setting of airway debris (ie, massive regurgitation).
Before we get to airway management and SALAD Park technique, we need to get something out of the way… The Yankauer should not be your “go to” device. To put it bluntly, the Yankauer sucks.

The Yankauer was designed around 1907 to assist in tonsillectomy. It has small holes designed to remove blood without harming delicate tissue. However, the Yankauer dramatically fails with significant regurgitation or blood, with easily clogged holes and much slower flow rates compared to rigid, large-bore suction catheters.[5-7] The Yankauer’s characteristics result in failure when we need strong suction the most. A suction device should be usable during direct and indirect laryngoscopy, possess a large internal diameter and hole size (decreasing the risk it is clogged),[7-9] and is able to pass an airway exchange device through its internal diameter. Also, remember that vent hole that needs to be occluded on the side of the suction catheter? If you didn’t, don’t feel bad, as many forget to occlude that hole when trying to suction.[7] A better device would not possess such a hole.
What other suction options do you have?
You have several other options for a rigid suction device. Before we start this discussion, we have no financial disclosures. Your goal is a device with greater diameter that is anatomically shaped to assist with intubation. The first is the SSCOR DuCanto Catheter,[10] which has a greater diameter (0.26 inches), no thumb port (thus the suction is always “on”), and the catheter is anatomically shaped to rest near the esophagus. This catheter may be better with hyperangulated blade due to its gradual curve. The SSCOR HI-D suction is similar to the DuCanto Catheter, but has a thumb port.[11] Due to its mild angulation at the end, it may be better with direct laryngoscopy.

A neonatal meconium aspirator provides greater ability for suction and decontamination, detailed in an informative article by Scott Weingart (EMCrit).[8,9] This article also addresses several challenges with using the meconium aspirator (using a stylet with the aspirator and reducing the length of the ETT).[8.9]
Finally, you can hook the suction catheter directly to the ETT, while allowing the ETT stylet to poke out of the suction catheter hole. For more on using the ETT for suction, see this great post from Dr. Josh Farkas at http://emcrit.org/emcrit/ett-as-suction-device/.[12]
You may have only a Yankauer in the ED. You can still make this work, but use multiple suctions, rather than relying on just one. This is a team sport: the more people you have assisting you, the better.
The Intubation…

- Even though we classically train to intubate patients in the supine position, this worsens patient oxygenation and increases risk of aspiration. Elevating the head of the bed by at least 20 degrees improves oxygenation and reduces risk of aspiration.[13] You can also place the bed in reverse Trendelenburg.
- While preoxygenating, be careful with positive pressure ventilation with ventilatory pressures > 20 cm H20, which can increase the risk of regurgitation and aspiration due to stomach ventilation.
- Preventing is often better than reacting with the airway. NG tube placement can remove gastric contents responsible for obstructing your view.
- Finally, onto the intubation. When entering the mouth, decontaminate the airway the best you can with rigid suction. Lead with your suction device in your right hand and laryngoscope in your left hand. Slowly move the suction catheter from the right side of the mouth to the midline and down the tongue in front of the laryngoscope blade. Using a videoscope can be challenging due to oropharyngeal contents, but leading with suction can improve the camera view.
- Make sure to insert the laryngoscope blade with the left hand hugging the anterior surface of the tongue, which avoids any regurgitated material in the oropharynx.
- When holding the rigid suction, an overhand grip is recommended. Why the overhand grip? This places the suction firmly in your hand, and it mimics the natural curve of the laryngoscope blade for better suctioning. You can use the rigid suction as a guide for the laryngoscope to control the tongue (like a tongue depressor) and improve placing the ETT within the trachea (similar to two hand laryngoscopy).
- If liquid material is present, no problem: the suction will do just fine. However, solids present a greater problem. There are spoon-like suction devices available.[14] If you don’t have a device with this shape, turn the patient to the side and perform finger sweeps or use the current rigid suction device to remove solid material.
- Use the rigid suction catheter to maneuver the tongue so the laryngoscope blade can achieve the optimal position.
- At this point with the suction on the right side of the mouth, you will most likely not be able to advance the ETT. To move the suction to the other side, you can remove it and place it on the left side of the laryngoscope blade, or the laryngoscope blade can be pushed slightly forward, creating space between the blade and the upper teeth, allowing you to move the suction left and up. The laryngoscope blade now effectively pins the suction device in place on the left. The suction catheter should be placed into the proximal esophagus, which acts as a constant drain.
- The suction device is now out of the way on the left, allowing ETT placement. If you’ve placed the suction device in the esophagus, you have a marker of where to not place the ETT or bougie.
- If holding the suction in front of the vocal cords, clear any contents that may be present. If fluid keeps reaccumulating, suction and intubate with the suction. If you used a wide-bore rigid suction device, remove the suction tubing and place a bougie through the suction. You can then remove the suction device and place the ETT over the bougie.
Tips and Tricks
That was a lot of dense, jam-packed goodness, but how do you optimize your efforts?
- Keep the head of the bed elevated.
- Hand the rigid suction to an assistant while you intubate. There’s no reason you need to operate both.
- Use the rigid suction device in coordination with the laryngoscope blade to maneuver the tongue.
- Park the suction device on the left side in the esophagus to keep removing contents coming from below.
- Other options include a neonatal meconium aspirator attached to the ETT, or the ETT itself connected to suction. If the ETT is severely contaminated, use an ETT exchanger and place a clean ETT.
What about the neck?
You are probably thinking about cricothyrotomy, which should always be a component of your airway plan. In a patient with massive hematemesis, asphyxiation and exsanguination are both concerns and the patient will need a definite airway. Videolaryngoscopy can help, especially when you have several assistants. Dr. Reuben Strayer discusses the “Four Provider ED Double Setup,” which also incorporates cricothyrotomy setup.[15] In this setup, provider 1 performs video laryngoscopy, provider 2 is to the right of provider 1 and suctions, provider 3 is to the left of provider 1 and suctions as well, and provider 4 is prepared to perform cricothyrotomy.[15]
Takeaways:
- Massive regurgitation is a major problem, especially when it comes to the airway.
- Consider the SALAD technique for the soiled airway (i.e., the patient with massive regurgitation, hematemesis, etc.).
- Yankauer’s are not optimal for general ED suction, especially for the airway. Use a wider diameter, more rigid suction device.
- Suction as you enter, and “park” the suction device on the patient’s left side of the mouth in the esophagus.
- Use the ETT to suction as you try to intubate.
- Use assistants for suctioning, and always prepare for cricothyrotomy.
References:
- James Du Canto, Scott Weingart: Episode 196: A vomit salad with Ducanto. EMCrit. Available at https://emcrit.org/emcrit/having-a-vomit-salad-with-ducanto/
- Chris Nickson. Suction Assisted Laryngoscopy Airway Decontamination (SALAD). LIFTL. Available at https://lifeinthefastlane.com/ccc/suction-assisted-laryngoscopy-airway-decontamination-salad/
- James Du Canto. Video of SALAD technique. Vimeo. Available at https://vimeo.com/123169076.
- Suction Assisted Laryngoscopy Airway Decontamination (SALAD). http://www.sscor.com/suction-assisted-laryngoscopy-and-airway-decontamination-salad.html
- Andreae MC, Cox RD, Shy BD, et al. 319 Yankauer Outperformed by Alternative Suction Devices in Evacuation of Simulated Emesis. Ann Emerg Med. 2016;68(4):S123.
- Kei J, Mebust DP. Comparing the Effectiveness of a Novel Suction Set-up Using an Adult Endotracheal Tube Connected to a Meconium Aspirator vs. a Traditional Yankauer Suction Instrument. Journ Emerg Med. 2017;52(4):433-37.
- Cox R,Andreae M, Shy B, et al. Yankauer suction catheters with “safety” vent holes may impair safety in emergent airway management. Am J Emerg Med. 2017 Nov;35(11):1762-1763.
- Weingart SD, Bhagwan SD. A novel set-up to allow suctioning during direct endotracheal and fiberoptic intubation. J Clin Anesth 2011;Sep;23(6):518-9.
- Weingart SD. A novel set-up to allow suctioning during direct endotracheal and fiberoptic intubation. EMCrit Blog. Published 16 October 2011. Available at http://emcrit.org/emcrit/ett-as-suction-device/. Accessed 02 November 2018.
- SSCOR DuCanto Catheter™ –“The Salad Catheter™. http://www.sscor.com/ducanto_catheter.html. Accessed 02 November 2018.
- SSCOR HI-D®– The “Big Stick®” Suction. Available at http://www.sscor.com/HI-D_big_stick_suction_tip-EMS.html. Accessed 02 November 2018.
- Farkas J. PulmCrit: Large-bore suction for intubation: strategies & devices. EMCrit Blog. Published 25 September 2017. Available at https://emcrit.org/pulmcrit/large-bore-suction/. Accessed 02 November 2018.
- Khandelwal N, Khorasand S, Mitchell SH, et al. Head-Elevated Patient Positioning Decreases Complications of Emergent Tracheal Intubation in the Ward and Intensive Care Unit. Anesth Analg.2016 Apr;122(4):1101-7.
- http://www.medicalexpo.com/prod/sscor/product-97867-746882.html
- Strayer R. The Emergency Department Double Setup. Published 25 October 2012. Available at https://emupdates.com/the-emergency-department-double-setup/. Accessed 02 November 2018.
Videos: To see Dr. Du Canto’s technique in action: