This homemade Laceration Trainer can quickly be assembled for practice.
Lacerations are one of the most common injuries that present to the Emergency Department. As lacerations requiring repair occur frequently, all providers must be familiar with the various methods of tying sutures, as well as attaining an effective level of comfort while suturing live patients. This is a skill that requires practice.
How would medical professionals practice the skill of suturing? Practicing on patients or investing in synthetic models are some of the options providers have to gain experience and improve their suturing technique.
Practicing on patients in the ED is not the place to begin suturing without proper training. Some of the synthetic models can demonstrate simple to complex lacerations, but are often costly and cannot be reused. Students, nurses, doctors or any medical providers that are learning how to or wanting to practice suturing should have accessible options that are cost effective.
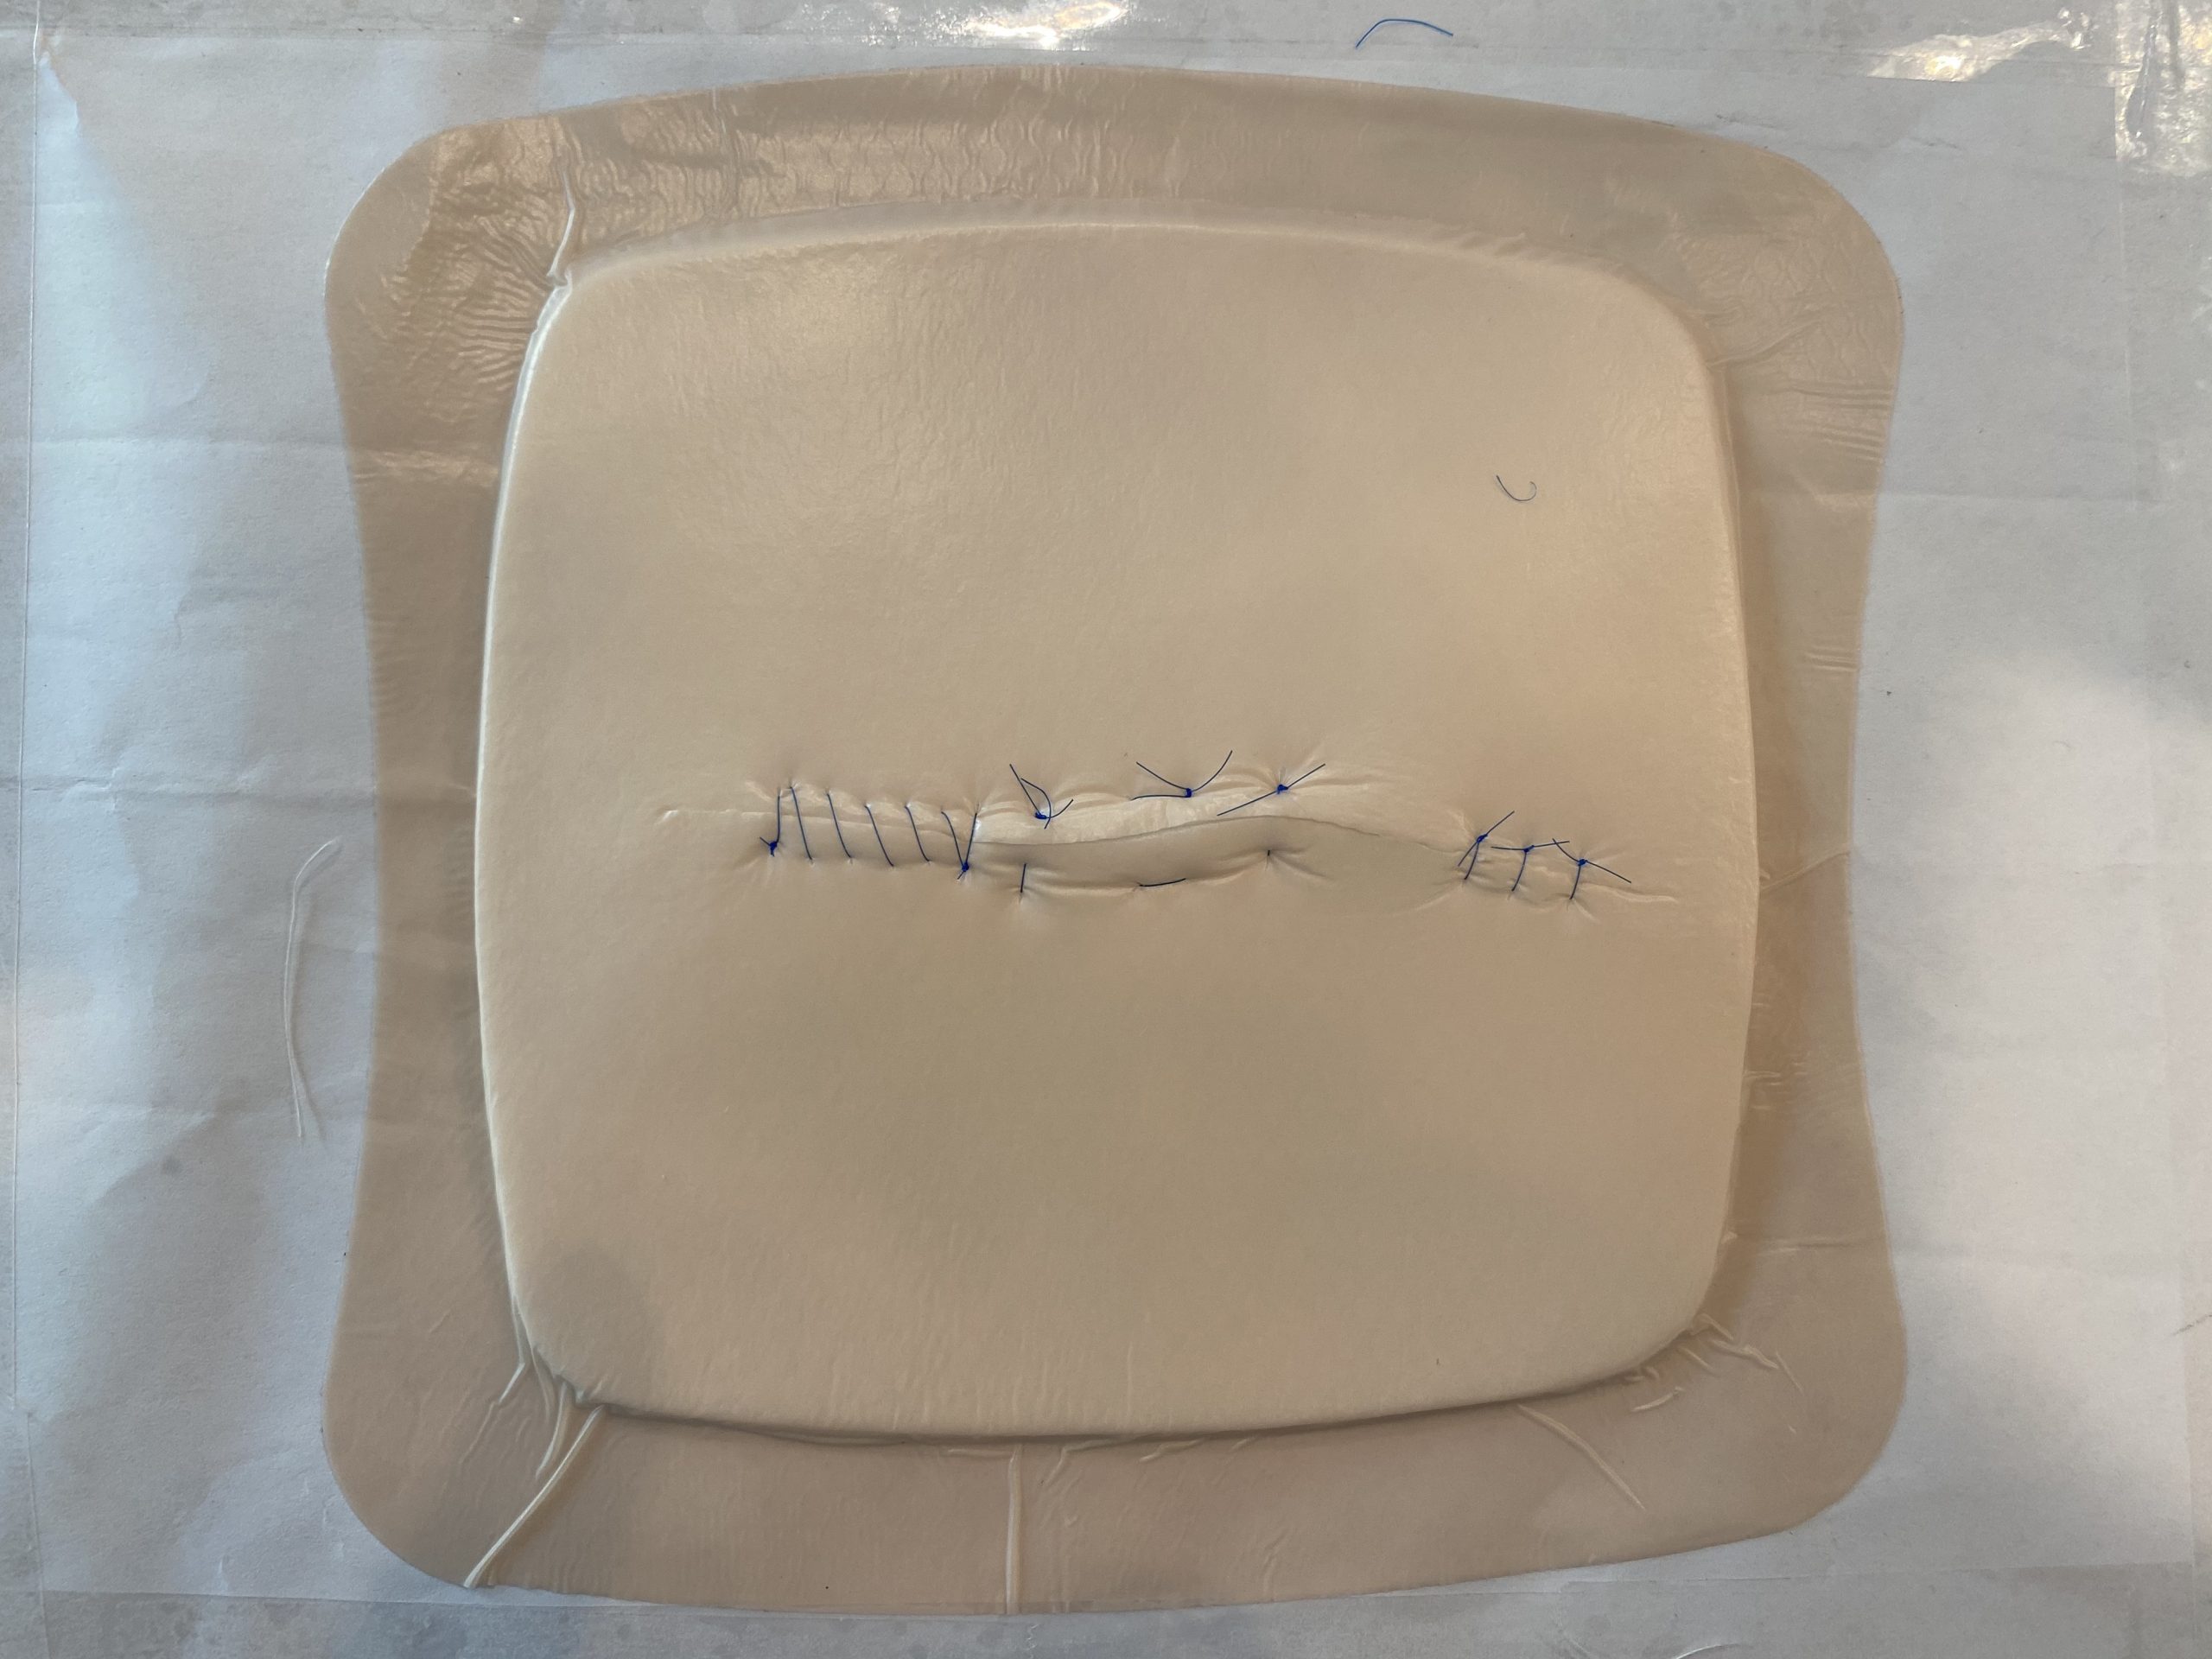
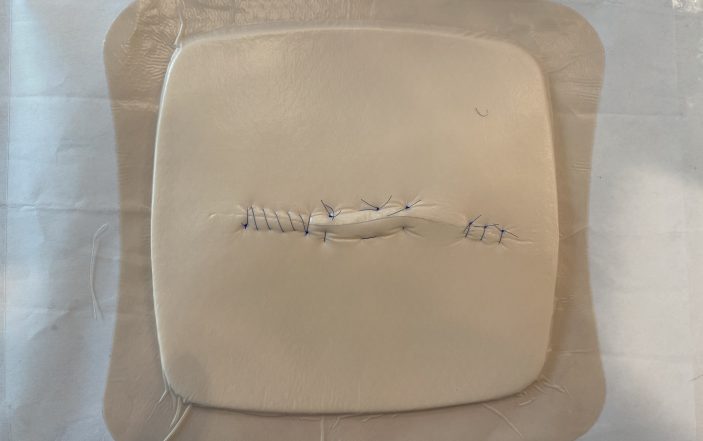
During a recent shift in the ED, we made a cost effective laceration trainer. It took only five minutes to assemble, and involves only a few simple supplies. Multiple techniques were performed including: simple, interrupted, continuous and even mattress type sutures.
The purpose of this laceration trainer is for providers to get a realistic experience that will help them become proficient and comfortable when suturing live patients.
With this trainer, any provider can improve their techniques and practice from the comfort of their homes or even on shift during downtime. The materials needed to create the trainer are very easy to find in most stores and pharmacies. They are also within an affordable price range, thus making it accessible to everyone’s budget and schedule.
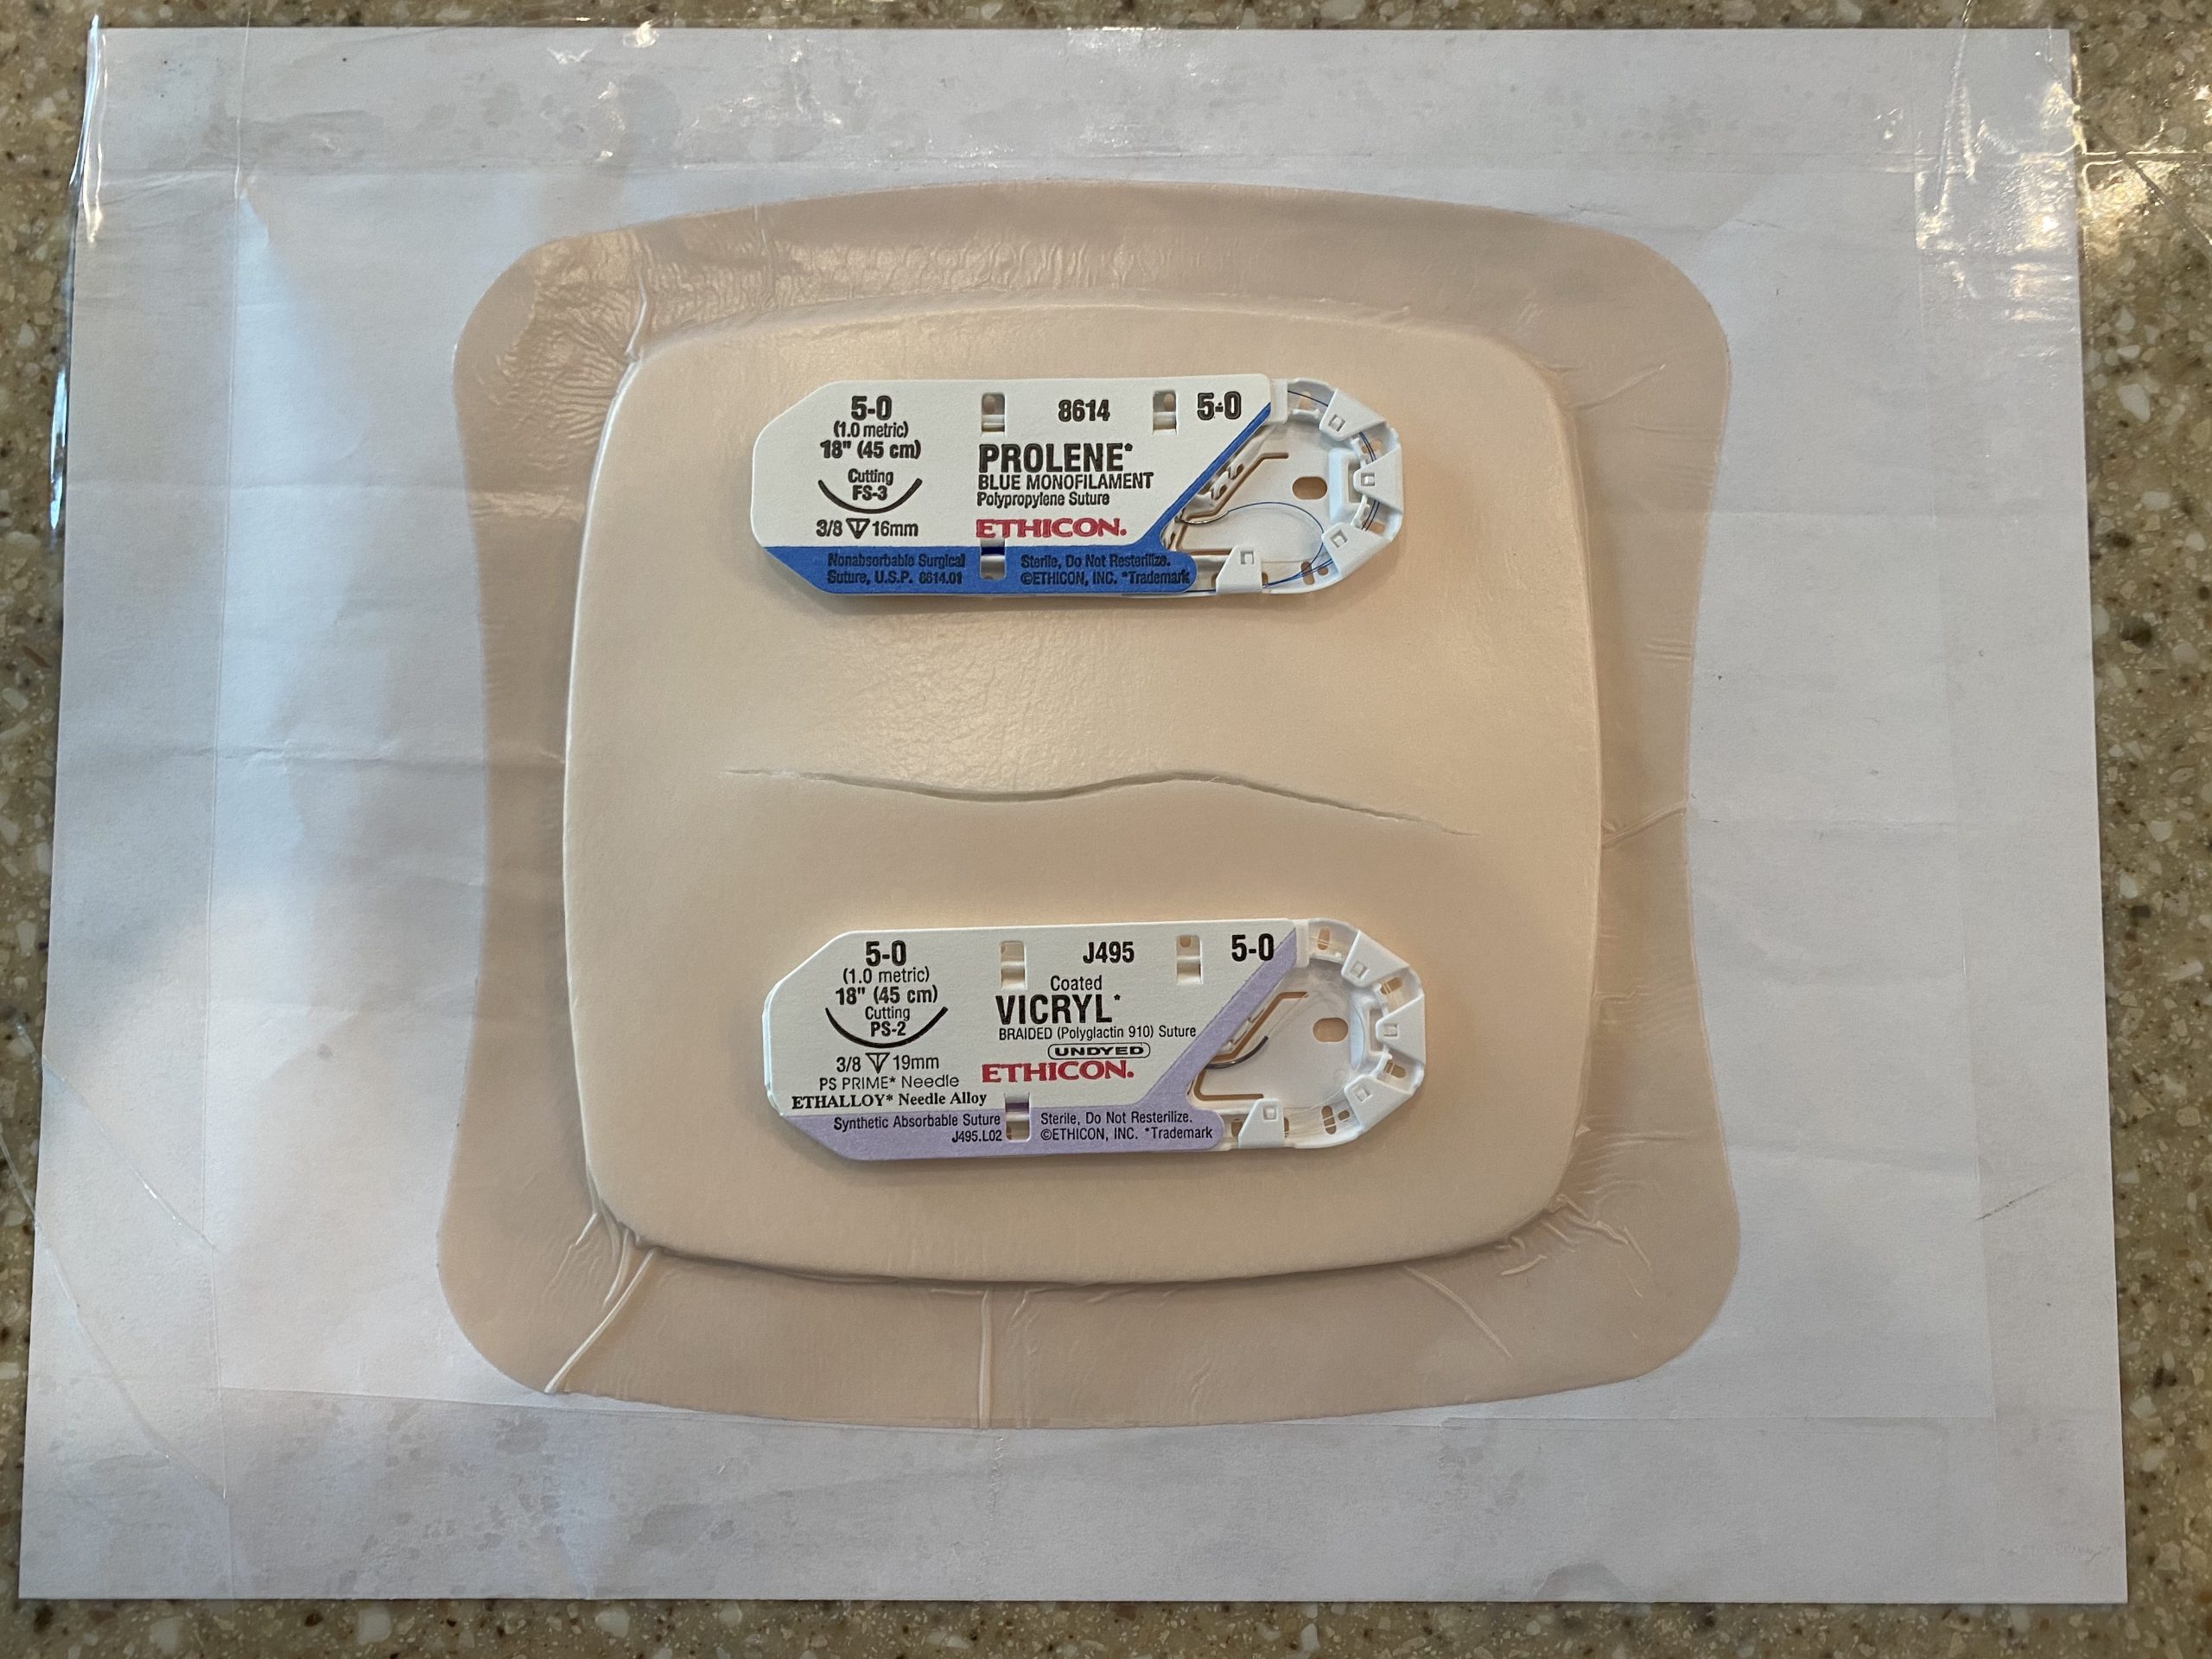
Items required for laceration model:
- 2” x 2” USP type VII gauze
- 8” x 3” Non-adherent pad
- 8” x 8” Aquacel Pro Foam
- 8 ½” x 11” Copy paper
Assembly for laceration model:
Step 1: Place both gauze pads aligned over the copy paper.

Step 2: Place the non-adherent pad over both gauze pads on the middle of the copy paper creating a cushion affect.

Step 3: Once the non-adherent pad is aligned in the middle of the copy paper, place the Aquacel Foam over the non-adherent pad.

Step 4: Once the laceration model is created, you can use a scalpel or any cutting tool to create the laceration in any direction. Make it as simple or as complex as you wish.

Step 5: Have fun and don’t cut yourself!